The Author – Bart Busschots
Creative Commons
Unless otherwise stated, the content on this site is licensed under Creative Commons Attribution, Noncommercial, No Derivative Works 3.0 License


Jul
20
Selective Colour With The GIMP
Filed Under Photography on July 20, 2008 | Leave a Comment
 This is how I do selective colour using the GIMP. I’m not claiming it’s the only way, or even the best way. I just know it works. This technique has a few powerful features though. Firstly it’s non-destructive, secondly it allows for partial de-saturation, thirdly it allows the channel mixer to be used to generate a very good black & white version of the image, thirdly, it allows for a controlled boost of the colour in the colour areas. This give you much more control, but it also makes the technique a little more complex than many other techniques you’ll find out there.
[tags]GIMP, Selective Colour, Tutorial, Image Processing, Photography[/tags]
Apr
16
My Tilt-Shift Instructions for GIMP
Filed Under Computers & Tech, Photography on April 16, 2008 | 25 Comments
In my first article on simulating tilt-shift miniature faking with the GIMP I linked to instructions from Gimparoo!. Firstly, these instructions are no longer completely correct on the latest version of the GIMP because some of the menu sequences used have changed. Secondly, I’ve been looking at other sets of instructions on the web for doing this with PhotoShop and comparing them to the Gimparoo! instructions (particularly these instructions). What I’ve found is that the Gimparoo! instructions are not entirely complete so I’ve decided to write my own.
As usual I want to stress that I am not making any claims that these instructions are in any way definitive. There may well be WAY better ways of doing this. What I’m saying is that this is the best way I’ve found of doing it so far and that it works for me.
[tags]Tilt-shift Photography, Tilt-shift, photography, GIMP, miniature faking, photo editing[/tags]
Apr
14
Tilt-Shift Photography With the GIMP
Filed Under Photography on April 14, 2008 | 3 Comments
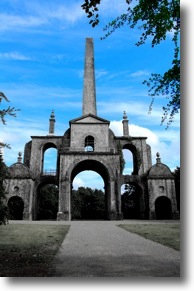
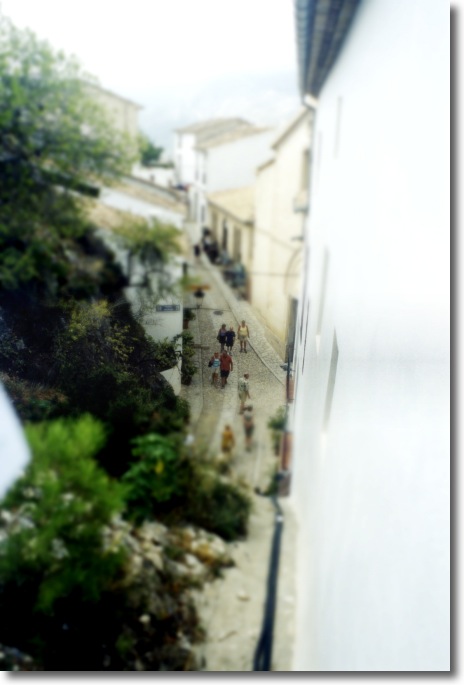
Tilt-Shift photography is an interesting technique which can be used to make the real world look like a miniature model. The ‘right’ way to do it is with a special Tilt-Shift lens but they are not cheap. Hence, people have found ways of cheating by taking the shot with a regular lens and then adding in the Tilt-Shift effect later during post-processing. I found a nice tutorial for doing this with the GIMP today so I figured I’d give it a go.
Unfortunately it takes a certain kind of shot for this to work well and it turns out I don’t have any well-suited images in my library. I did find one shot that was close to what was needed so I had a go with that. The results aren’t great but I guess it gives some sort of idea of what I’m on about. I’m going to keep an eye out for opportunities for taking suitable shots and should I succeed I’ll post back with my results. In the mean time, here’s some examples of how it should be done.
Update (16 April 2008): I’ve created my own more current and more detailed tutorial here.
[tags]Tilt-Shift, Photography, GIMP[/tags]
Oct
1
Two Nice Photo Editing Tips for the GIMP
Filed Under Photography on October 1, 2007 | 1 Comment
Those of you who actually poke around my Photo Gallery may have noticed that I’ve had a section for desktop wallpapers there for a while now. You may have wondered why I’d never blogged about it before. Well, the reason is that I wasn’t happy with my wallpapers. They all looked a bit flat to me. I spent a few hours this evening tweaking them and now I’m finally happy enough to announce them. They are still far from perfect. I still consider them amateur creations, but I’m not ashamed to announce them any more. So, here’s the link.
While trying to get these wallpapers into a descent state I came across two very cool GIMP tutorials, one which really lets you boost the colour intensity of your images, and another that lets you create really cool partly colourised black and white images.
[tags]GIMP, Image Processing, Photo Editing, Wallpapers[/tags]