The Author – Bart Busschots
Creative Commons
Unless otherwise stated, the content on this site is licensed under Creative Commons Attribution, Noncommercial, No Derivative Works 3.0 License


Jul
26
Right-click to Copy File Contents to Clipboard on macOS with Automator
Filed Under Computers & Tech, Automation on July 26, 2019 at 12:53 am
How often does someone email you a file who’s content you need to copy-and-paste into a web form of some kind? Maybe it’s just me, but I find I need to do it a lot!
What I wanted was the ability to right-click any file with plain-text content (text, markdown, XML, JSON, Certificate Signing Requests, …) and send its content to the clipboard.
By combing Automator, the cat and pbcopy terminal commands, and a little JavaScript, I was able to build a nice service that can be accessed by right-clicking any file in any app that reports its outcome using a standard OS notification.
Download the Quick Action here, extract it, and copy it to your ~/Library/Services folder.
When I want to add new functionality into the macOS GUI I usually starting by thinking about how I’d do it on the command line. In this case I’d do that by using the cat command to output the file and then pipe the content into the pbcopy command. As an example that will work on any Mac, you can copy the contents of your hosts file to the clipboard with:
cat /etc/hosts | pbcopy
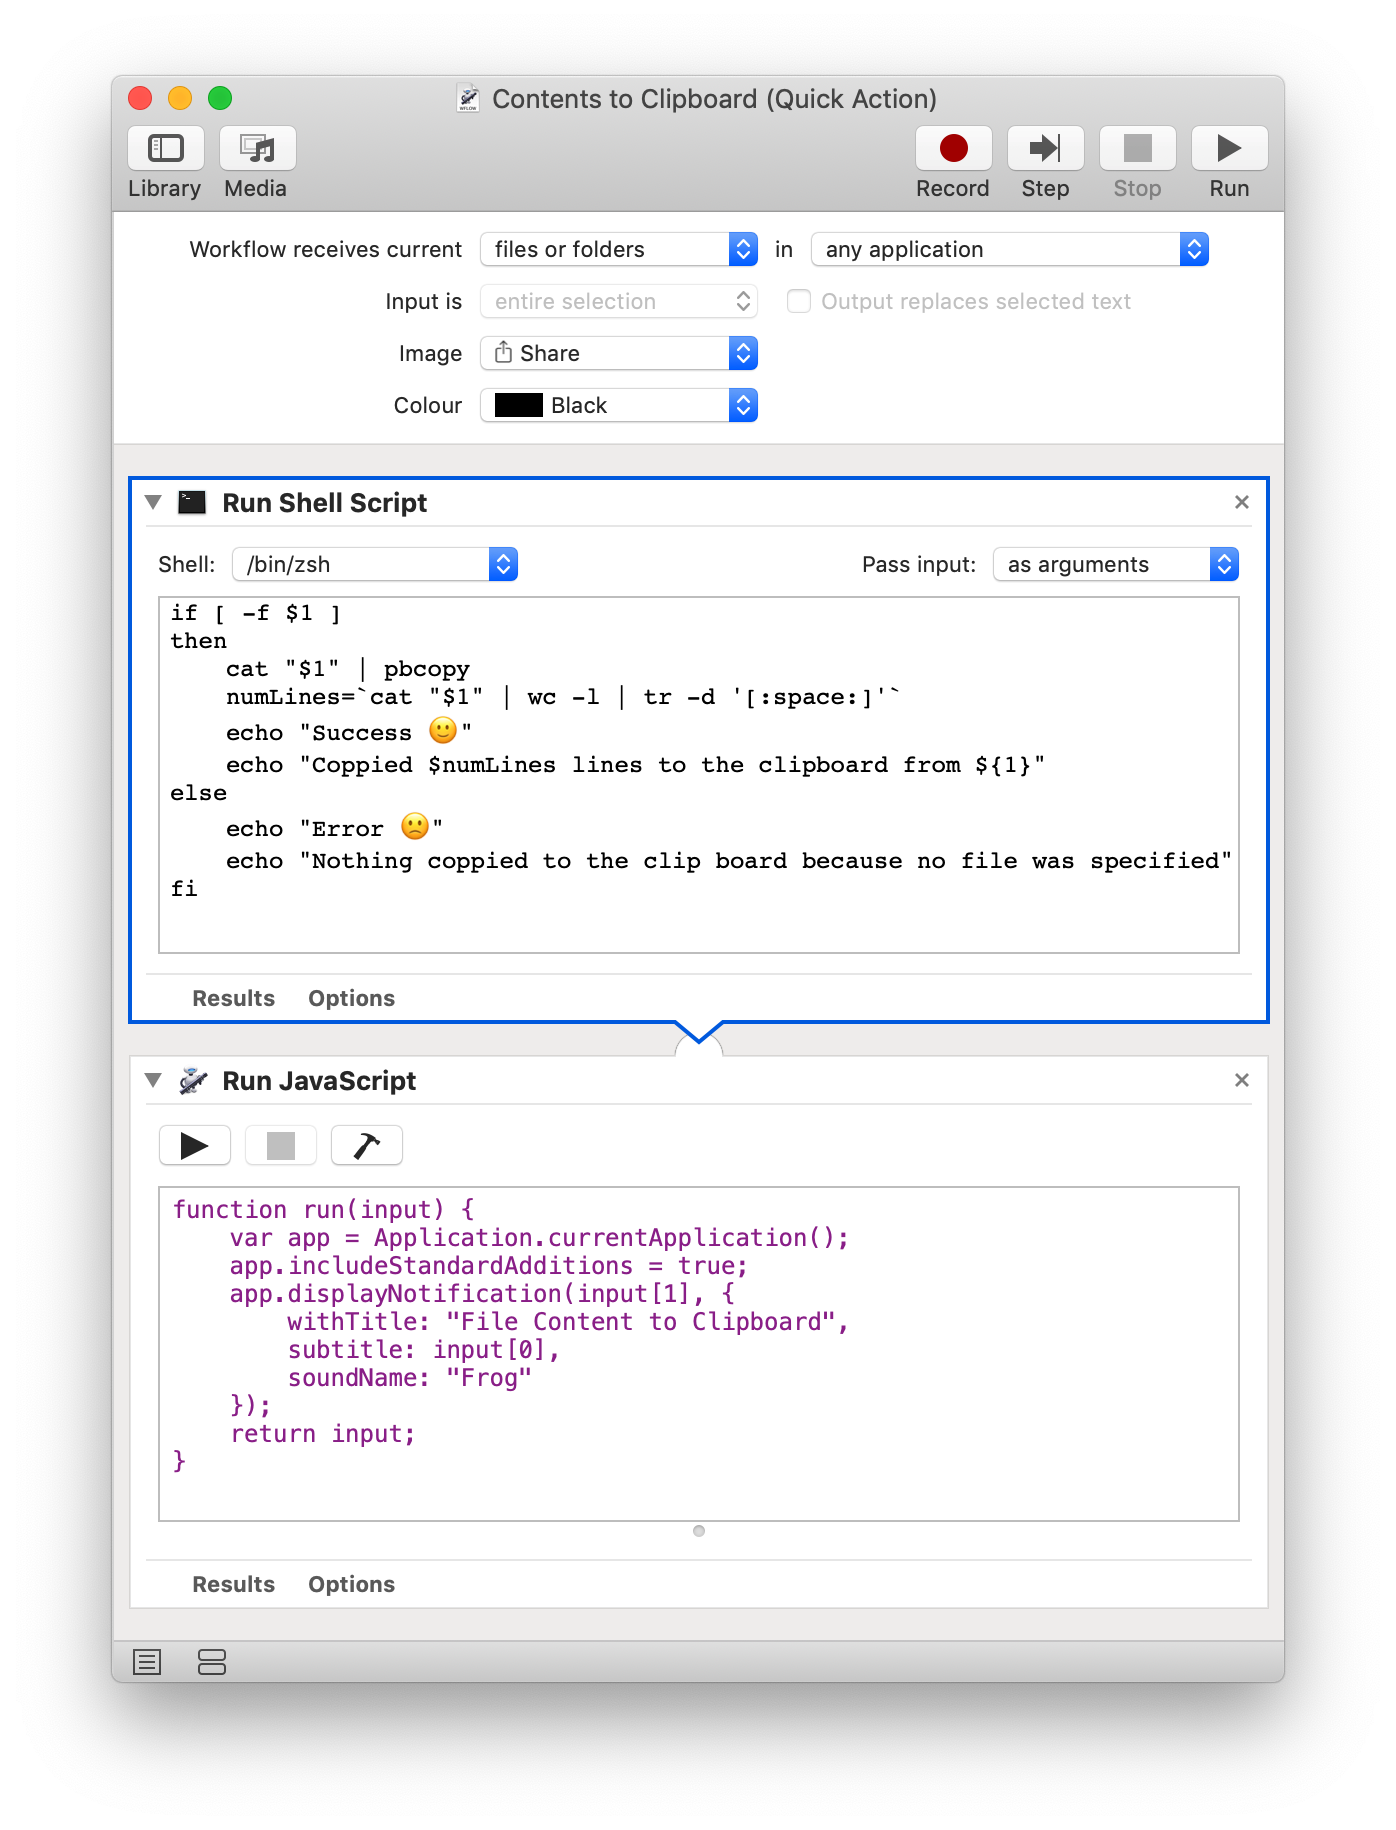
The first step is to open Automator and create a new Quick Action workflow. At the top of the new document set the workflow receives dropdown to files or folders, and the in dropdown to any application.
In Automator we can use a Run Shell Script block to execute terminal commands. We could use any shell, but since Apple is pushing us all to ZSH, I chose to set the Shell dropdown to /bin/zsh. The block also lets us choose how we’d like to receive the inputs the block receives. I like to set the Pass input dropdown to as arguments. That makes the path to the first file the block receives available as $1 within our ZSH code.
The most basic working implementation would simply have the following in that block:
cat "$1" | pbcopy
That won’t provide any notification of what happened though, so I went for a more complex implementation that also uses the wc command to count the number of lines, and an if statement to produce appropriate output for success and failure:
if [ -f $1 ]
then
cat "$1" | pbcopy
numLines=`cat "$1" | wc -l | tr -d '[:space:]'`
echo "Success 🙂"
echo "Coppied $numLines lines to the clipboard from ${1}"
else
echo "Error ðŸ™"
echo "Nothing coppied to the clip board because no file was specified"
fi
Let’s break that down a little! In Zsh (and Bash and sh), the -f operator tests if something is a regular file. In this case, Automator would only let us choose ‘files or folders’, so the path in $1 could lead to a folder instead of a file.
Assuming $1 does point to a file, the then block will execute, otherwise, the else block will. The then block starts with our bare-bones command to send the content of the file to the clipboard, and then it uses the wc command with the -l flag to count the number of lines in the file and store that number in a variable named numLines. The back-ticks tell Zsh (or Bash or sh) to execute the text within the ticks as terminal commands, and save the result of executing that command into the variable. In an ideal world that line would simply be:
numLines=`wc -l "$1"`
But if you pass wc a file name as an argument it prints the path to the file in the output. The only way around that is to pipe the text into wc, so a better version of the command would be:
numLines=`cat $1 | wc -l`
But, even when you pipe the text to wc, it still surrounds the number with a bunch of empty space. We can use the tr command to strip that out, hence the line has to read:
numLines=`cat "$1" | wc -l | tr -d '[:space:]'`
Regardless of whether the then or else blocks are executed, exactly two lines of output will be created from the script using the echo command. This means that the block will produce two items as input to the next block in the chain.
The reason I want two items is so I can create an OS-level notification with a title and some text. The easiest way I could find to create a notification is to use macOS’s (relatively) new JavaScript API. So, the next block I added was a Run JavaScript block.
The way this block works is that it returns the result of executing a function named run(). That function gets passed the inputs to the block as the first argument. The inputs are passed as an array. In my code I chose to name the first argument input, so the first item the block receives will be input[0], and the second input[1].
To display a notification you first need to get a reference to a JavaScript object representing an app. To do this I use some cookie-cutter-code to get a reference to the app from within which the user right-clicks the file to start this whole workflow running:
var app = Application.currentApplication();
app.includeStandardAdditions = true;
Once I have a reference to the app I can use the .displayNotification() function to display a notification. This function takes a single object as an argument, and that object defines the various options for the notification.
Putting it all together, my Run JavaScript block contains the following:
function run(input) {
  var app = Application.currentApplication();
  app.includeStandardAdditions = true;
  app.displayNotification(input[1], {
    withTitle: "File Content to Clipboard",
    subtitle: input[0],
    soundName: "Frog"
  });
  return input;
}
This gives me a final workflow that looks like this:
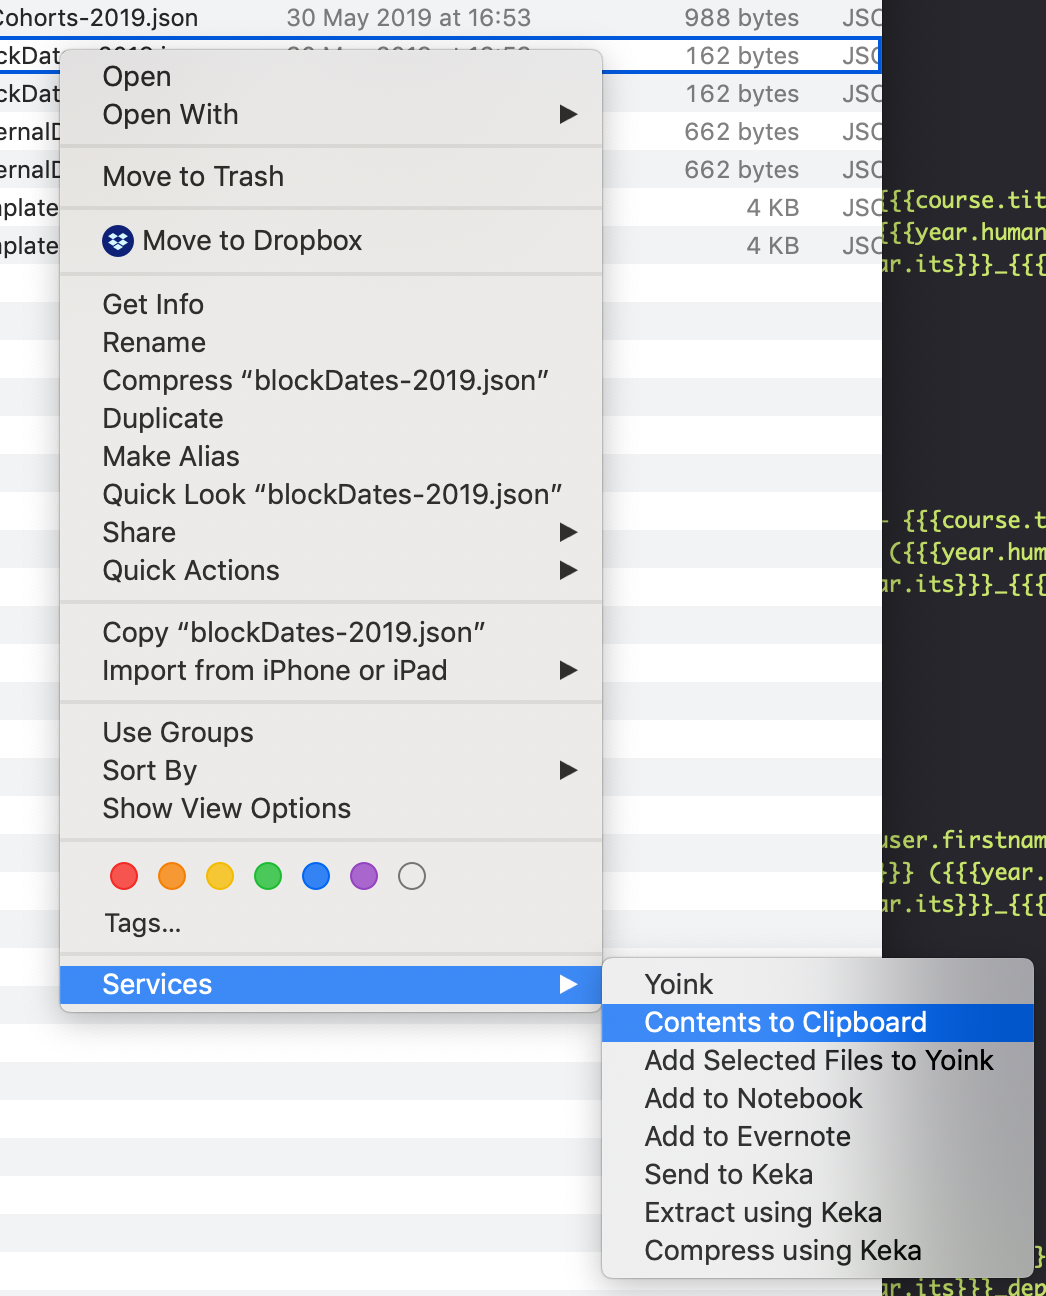
In the finder or in mail you can get it by right-clicking on a file and looking for it under the Services menu item: