The Author – Bart Busschots
Creative Commons
Unless otherwise stated, the content on this site is licensed under Creative Commons Attribution, Noncommercial, No Derivative Works 3.0 License


Jul
25
Photographing at Dusk – My Approach
Filed Under Photography on July 25, 2014 at 1:44 pm
As with everything in photography, there are an infinity of right ways of capturing that wonderful light you get just before and just after sunset. This is a description of the workflow I’ve settled on after much experimentation. It works for me, and it gives me shots with a look and feel that I like – largely realistic, but with a touch of artistic license to try capture the feel as well as the physicality of the light.
I put a lot of effort into processing my dusk shots, but, my aim is to end with a final product that doesn’t look like it’s been heavily processed. There are two reasons so much processing is needed on these kinds of shots:
- High Dynamic Range – Our eyes have a much greater dynamic range than our screens or a JPEG image can represent, and at dusk, the dynamic range is well beyond what a JPEG can represent, so what our eyes seen, and what you get straight out of a digital camera look very very different indeed.
- Mixed White Balance – Dusk scenes almost always involve mixed white balances across the scene. If you balance for the sky, the ground is usually wrong, if you balance for the ground, the sky will usually be wrong.
Shooting at dusk is all about dealing with these two problems.
The Alternative – Sacrifice Realism, Embrace the Limitations
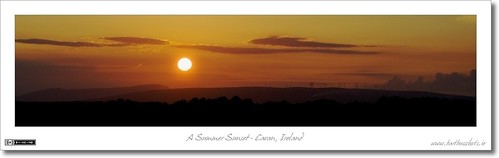
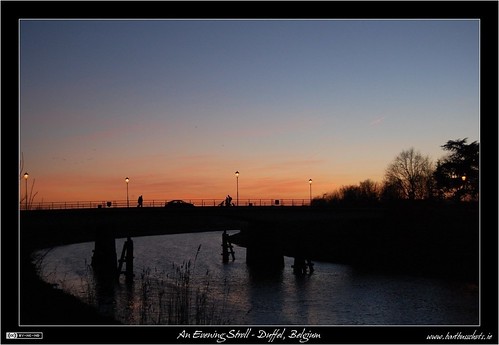
One very simple approach to the problems of shooting at dusk is to accept the limitations, and to work with them, rather than against them. Accept the low dynamic range, and the mixed white balance, and simply silhouette the ground against a well exposed sky. This way, there is no major work needed in post. The dynamic range ‘problem’ has been turned into an opportunity, and the white balance issues goes away completely because black is black!
As a matter of personal taste, I don’t go down this route very often, but I have done on occasion, and have loved the results. Below are some examples:


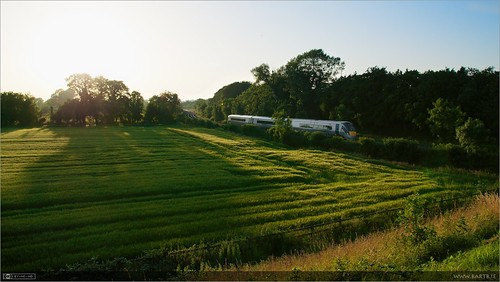
The inverse approach can also work, rather than exposing for the sky, and silhouetting the ground, you can exposure for the ground, and blow out the sky. I’ve only found this to be a good option when the sun is still a few degrees above the horizon, and casting nice long shadows:
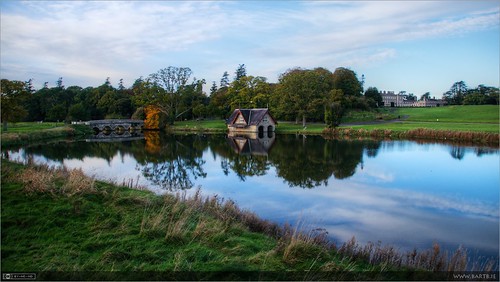
Something else that can sometimes works well in the minutes leading up to sunset is to turn your back on the setting sun, and shoot in the opposite direction. You tend to have nice colours along the horizon opposite the sun, and, you’ll have lovely soft low light illuminating the scene. The one draw back is that you’ll have a really long shadow, which you’ll need to try hide somehow.

Towards A Natural Look
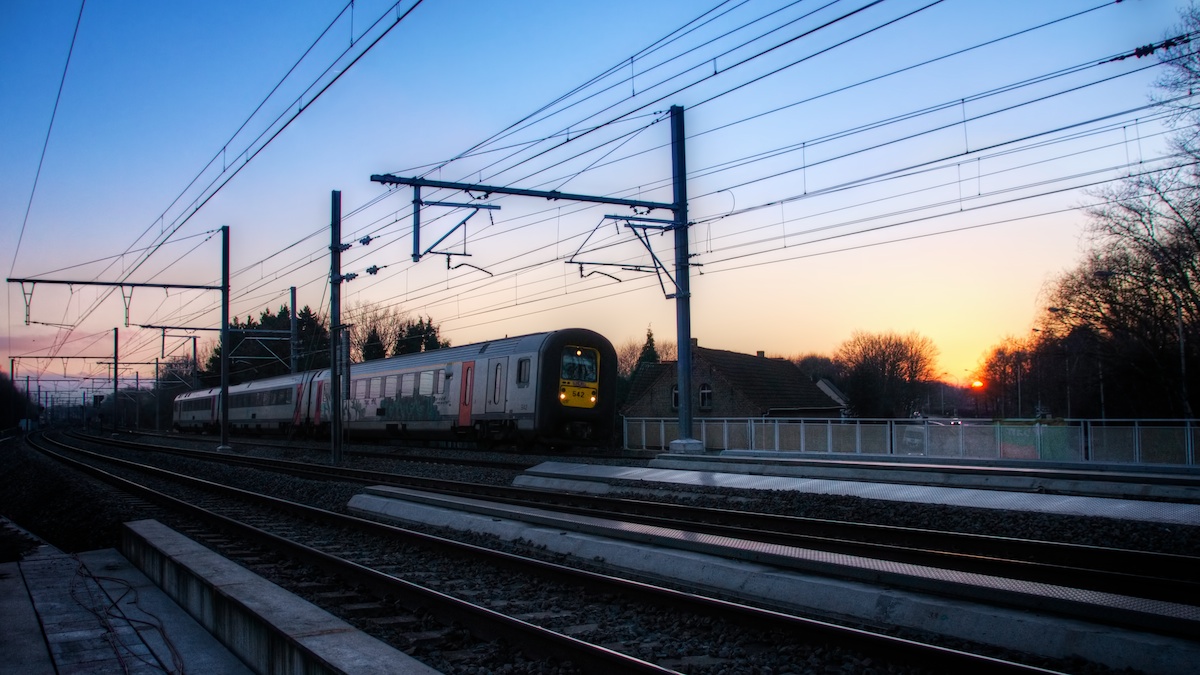
While I do sometimes use all the techniques above to produce shots I’m proud to put my name to, they don’t capture the feeling of dusk in the way I really want to. To do that, I shoot RAW, and rely on software to deal with the dynamic range and the mixed white balances. The hard part is to do that and still end up with natural looking image like these:


In the Field
My workflow actually starts before I press the shutter. When in the field, it’s important to capture the image in such a way that it can be edited to produce the result I’m after. There are four important factors in the field:
To reliably get good results I’ve found that I need to take full control of my camera, in other words, shoot in manual mode. It can be done in a semiautomatic mode like Aperture Priority by adjusting the exposure compensation, but that’s making things much fiddlier.
With the camera in manual mode, I automatically dial in the following settings before dealing with the exposure triangle (ISO, Aperture, and Exposure):
- Select RAW Mode – my process entirely relies on using the extra data captured in a RAW image to restore lost shadow detail, it simply can’t work on anything but a RAW image.
- Set a Daylight White Balance – there is inevitably going to be a mix of white balances in a dusk shot (the sky and the parts of the land in shade), rather than trying to find a middle-ground between both, and getting the entire image wrong, I choose to get the sky right, and then deal with the shaded parts of the ground in post. To get a natural dusk sky, with blues overhead and yellows and oranges on the horizon, a daylight white balance works well (the sun icon on many cameras, or 5000K).
The art comes in setting the exposure, aperture, and ISO. There are no hard and fast rules, but I can give some guidelines, ranked in order of importance, with the most important first:
- Avoid Blowing out the Highlights – this is the absolute key to the process, and it’s it’s a real balancing act. The more light you capture, the less brightening the shadows will need, and hence the less processing needed, and the easier it is to get a pleasing outcome. However, if an important highlight is lost, it’s gone, and the shot is useless. Note that I say an ‘important highlight’, it’s OK to lose a few specular highlights, or the disk of the sun, there’s no detail in any of these things to lose. It’s not OK to lose a cloud, or part of a cloud, that will just look awful when processed. I find the brightest exposure were nothing I care about is blown out, and then brighten it by two-thirds of a stop (two clicks on most modern cameras) because I know the RAW file will capture at least enough information to recover those highlights.
- Keep the ISO low – tone-mapping amplifies noise, the less noise there is to start with, the better.
- Keep the DOF High – We’ll be capturing foreground detail as well as sky detail, so in effect we’re capturing a landscape. If possible, I keep my ISO at about f/8.
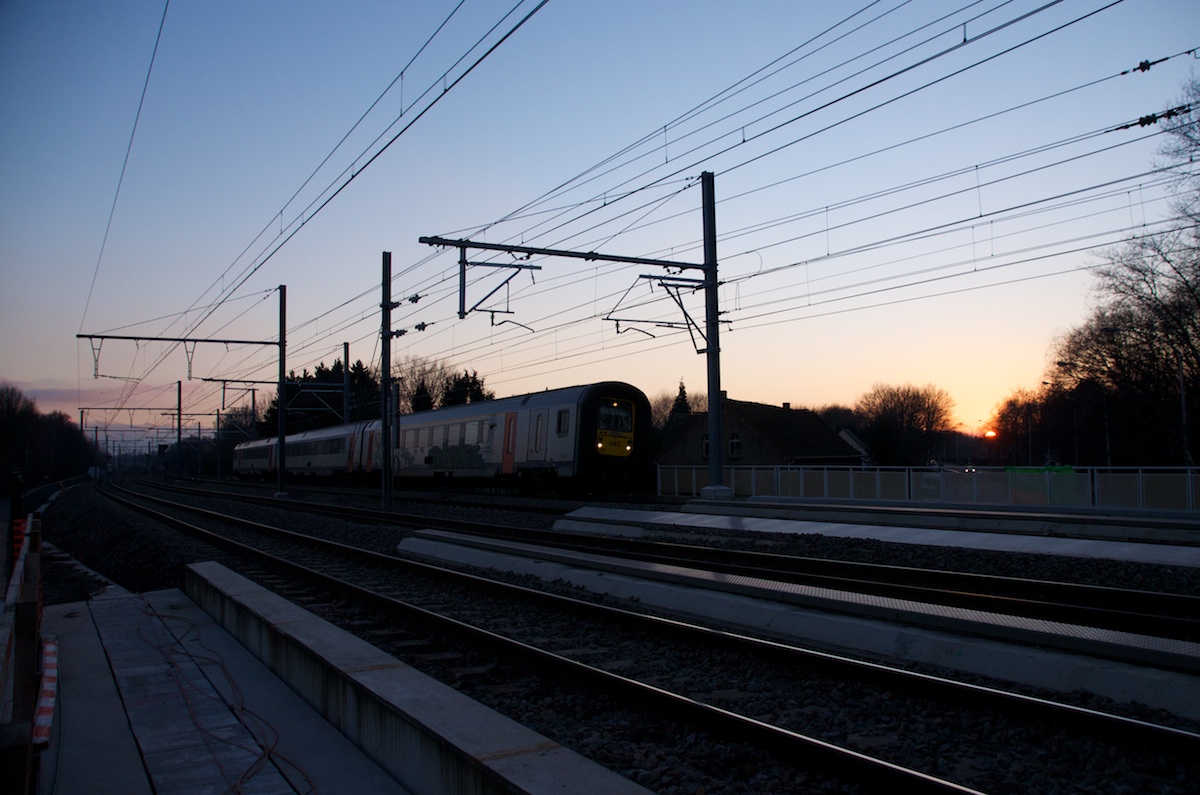
This will always result in an image that looks under exposed, and very un-interesting – in the case of our example, this is how the shot came out of the camera:
Tone-mapping
I start my post processing by tone-mapping the shot in Photomatix Pro. The aim here is to use Photomatix to- bring out a realistic amount of the hidden detail in the foreground and sky, and to do so without adding unwanted artefacts like halos.
Because Photomatix is known to do a poor job of working with Nikon RAW files, I use Aperture to export a copy of the original image as a 16bit TIFF first, and then open that TIFF in Photmatix for editing. While in Aperture I also use the shadow and recovery sliders with Highlight Hot & Cold Areas enabled (in the View menu) to recover shadows until there are no blue areas left, and highlights until there are no red areas left before exporting as a 16bit TIFF.
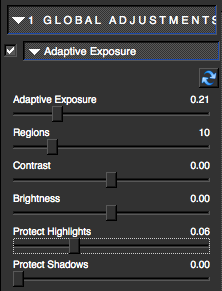
The hard part comes in Photomatix, and there is no substitute for practice, using Photomatix is a skill you can only learn through lots of trial and error. What I can give you is the presets I use as my starting point when working on an image in Photomatix:
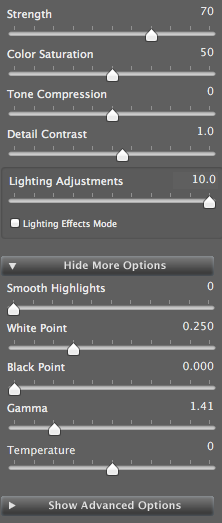
I have the above saved as a preset. With that preset applied the first thing I then do is adjust the white point until it is as bright as it can be without blowing anything out. If the shadows are looking much too bright I’ll also tweak the black point a little. I often also dial in a little more gamma to get the contrast looking right. If there is not enough detail in the foreground I’ll adjust the Tone Compression, and finally, if the result is looking too unrealistic, I’ll dial back the Strength.
Don’t worry if the shadows look a little washed out at this stage, Photomatix has a tendency to do that. Below is the way our example image looked when it came out of Photomatix:
Topaz Adjust (and maybe Topaz DeNoise)
To counter-act the flatness Photomatix often adds to an image, the next step is to run the output of Photomatix through the Topaz Adjust plugin. The aim is to increase local contrast. Like Photomatix, it takes a little practice to get proficient with Topaz Adjust, but I usually use settings something close to those shown below, with the addition of a little detail enhancement sometimes, and a small selective saturation boost:
If at this stage in the processes, there is more noise than I find tolerable I’ll also run the image through Topaz DeNoise.
I use the stand-alone Topaz PhotoFXLab app for applying Topaz Plugins. I save the output from Photomatix as an 8bit TIFF, open that 8bit TIFF in PhotoFXLab, apply Topaz Adjust, and perhaps Topaz DeNoise, and then export again as a new 8bit TIFF. To allow any phase of the process to re-visited in the future I import both 8bit TIFFs into Aperture and stack them with the original file, with the post-Topaz version as the stack pick. It’s this version that will get the final tweaks in Aperture. In this case, it looked like this:

Final Edit in Aperture
With the output of all the external editors now back in Aperture it’s time for the final edit, to really bring the shot to life.
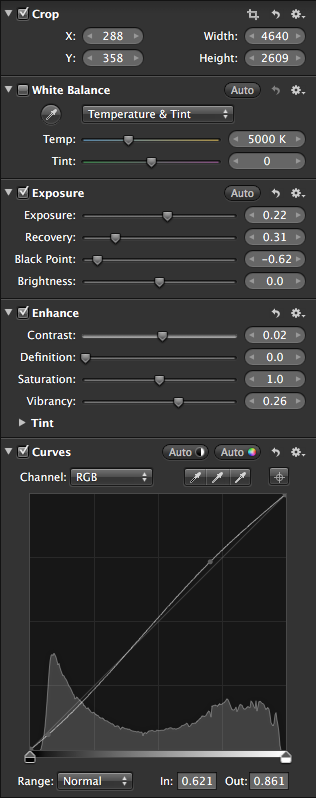
The default ordering of the bricks on Aperture is not accidental, they provide a suggested order of doing things, the idea being that you should work from the top down. I generally stick to this suggested order. The first thing I do is apply basic global edits to the shot. First and foremost, a crop to optimise the composition, then some tweaks using the Exposure brick, then some Vibrancy and perhaps some Definition in the Enhancement Brick, and finally a curves adjustment.
For the example image, I started with the following basic edits:
At this stage the final image is beginning to take form, and the large dynamic range has been dealt with. However, what has not yet been dealt with is the mixed white balance, and in fact, it has been exaggerated by adding vibrancy. Everything on the ground in shadow (which is everything in our example image) now has a nasty blue cast:
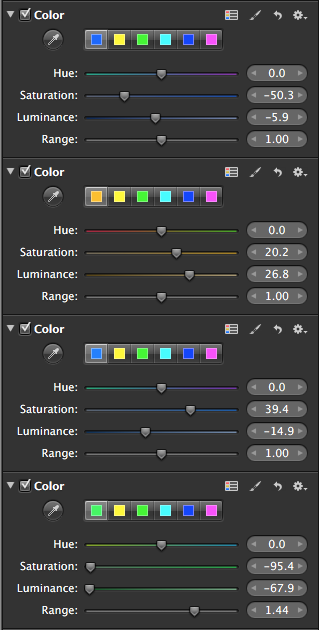
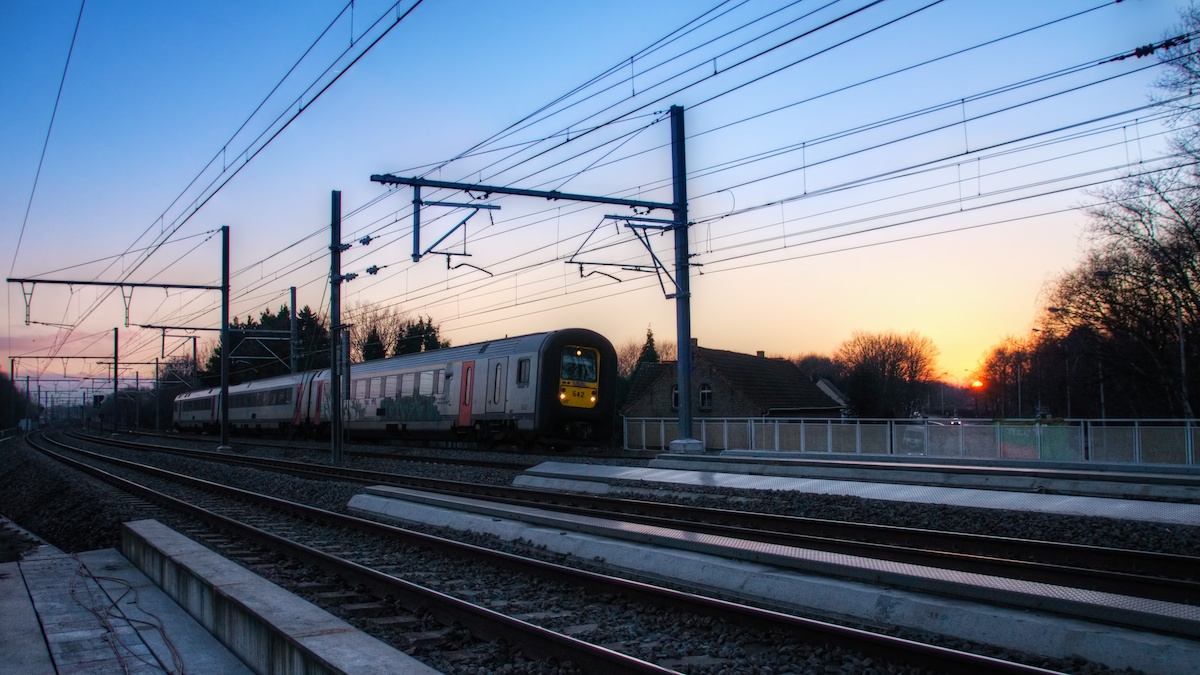
The next step is to get the colour right. This is done with one or more Aperture Colour blocks, painted in as needed. First, desaturate and reduce the exposure of the blues in all shaded regions. This will remove the horrible colour cast. If the blue in the sky is lacking in impact, selective saturate and perhaps darken the blues in the sky. If I’m shooting trains I always selectively saturate and brighten the yellow on the front of all European trains because in reality the paint is reflective, and the camera never quite captures that. Finally, in this example there is a nasty bright green banner suspended on the bridge, I also desaturated that green, giving a total of four selective colour adjustments:
- Selectively desaturate and darken the blues in the shadows
- Selectively saturate and darken the blues in the sky
- Selectively saturate and brighten the yellow at the front of the train
- Selectively desaturate and darken the greens in the banner on the bridge
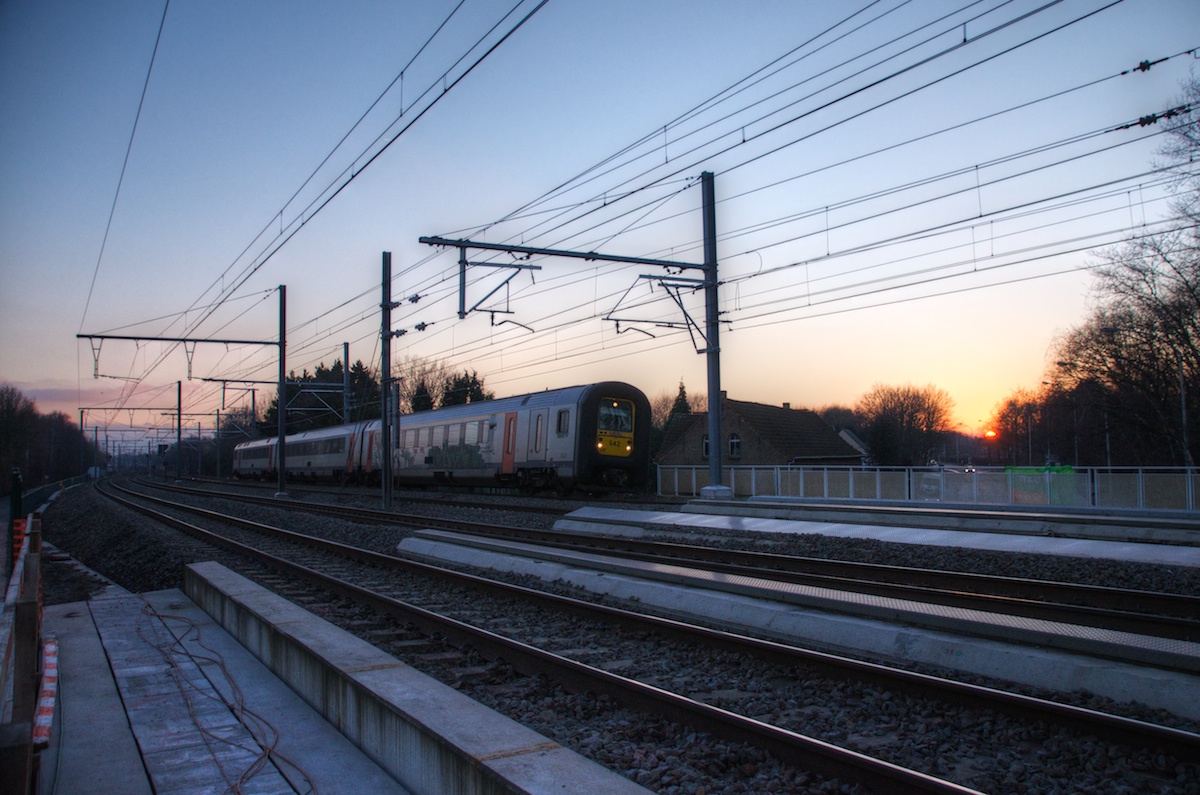
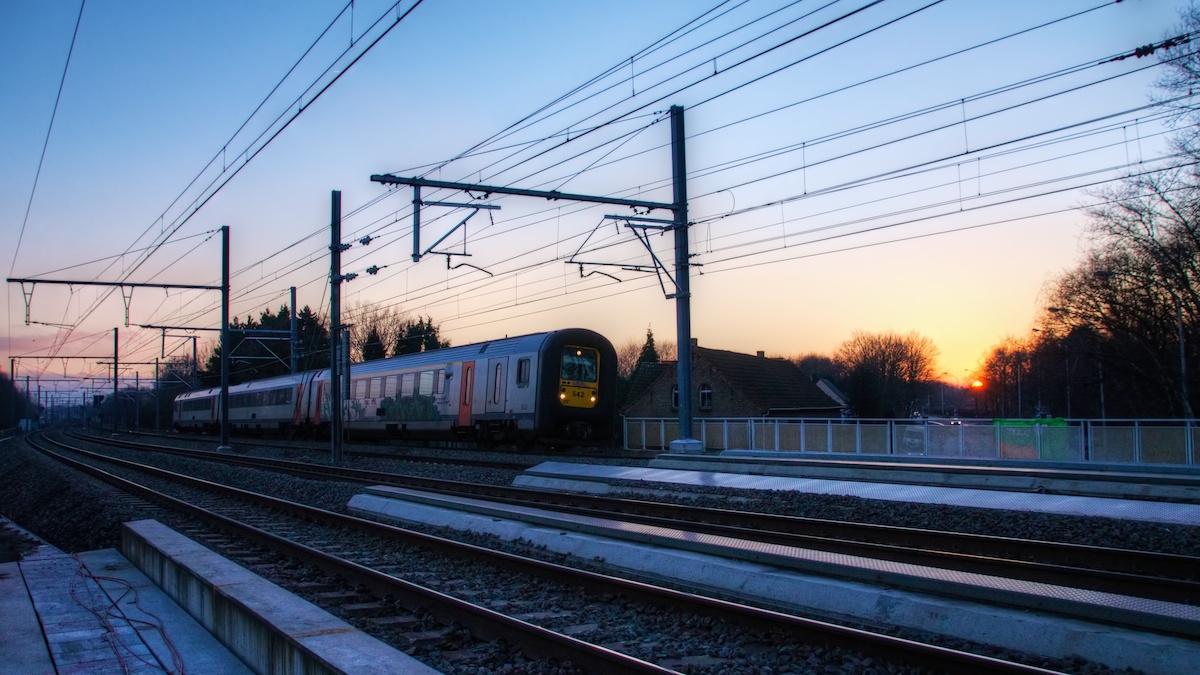
With the colour now adjusted, the image is almost complete:
The final piece is to help focus the eye with a subtle vignette. Depending on the composition, I often apply the vignette selectively, choosing not to darken features that act as leading lines like paths leading into shot etc.. Sometimes the vignette alone is not enough to de-emphasise the bits I want de-emphasised, and to emphasise the bits I want emphasised, so sometimes I also do a little dodging and burning to give the image a final tweak. In the case of this image I selectively darkened some of the brighter features on the bridge in the foreground because I found them distracting.
After all that, I always hope I end up with a shot that looks like I did none of that. If the edits are good, only photographers will know that the final result couldn’t have come straight out of the camera.