The Author – Bart Busschots
Creative Commons
Unless otherwise stated, the content on this site is licensed under Creative Commons Attribution, Noncommercial, No Derivative Works 3.0 License


Oct
3
Creating an OS X Application from a Java JAR
Filed Under Computers & Tech, Software Development on October 3, 2006 at 3:42 pm
On OS X you can run a JARed Java App by simply double clicking the .jar file. This works but it has a few downsides. For a start you can’t keep the app in your dock so you can launch it easily and you also can’t easily launch it with things like HimmelBar. Secondly it will always have the Java JAR icon and if you’re running a few Java JARs this can get very confusing. What you really want is the same Java App but wrapped inside an OS X App. Examples of this would be the OS X version of jEdit. If you have the Developer Tools (XCode) installed on OS X this is trivial to do. If you don’t have the developer tools installed you’ll find and installer for them on your OS X DVD.
[tags]OS X, Java, Application[/tags]
I’m going to explain the process with a worked example. I’m going to wrap the freeware Java version of HJSplit which you can get from www.freebyte.com/hjsplit/ into an OS X App. We’ll need two apps to get this done, Jar Bundler (Developer -> Applications -> Java Tools -> Jar Bundler) and the Icon Composer (Developer -> Applications -> Utilities -> Icon Composer).
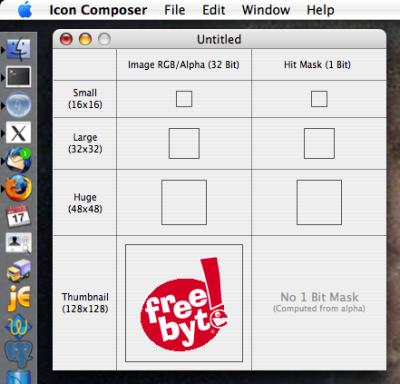
The first step is to create an OS X icon file for our new App. When I need to pick an Icon I generally do a google image search on a related term and then pick something. In this case I’m going to use the FreeByte logo since HJSplit is released by FreeByte. When ever you have an image file you like you need to edit it with your favourite image manipulation program (I use the GIMP) so that it is 128 x 128 pixels and saved as a PNG. To make the logo look good it should also be on a transparent background. Note that if you save the image as a GIF instead of a PNG the transparency you set will be lost when you try to use the image in the Icon Composer. Once you have your image saved in the correct format launch the Icon Composer. When it opens it will create a new icon file which looks like a collection of empty boxes. These are for different sized versions of your icon but we’re not going to bother with that. We’ll just create a simple icon which contains just one image, the biggest one. To do this drag and drop your image file from the Finder into the biggest of the available boxes in Icon Composer. Then save the file. This will create an Apple Icon Image file from the image (.icns file).
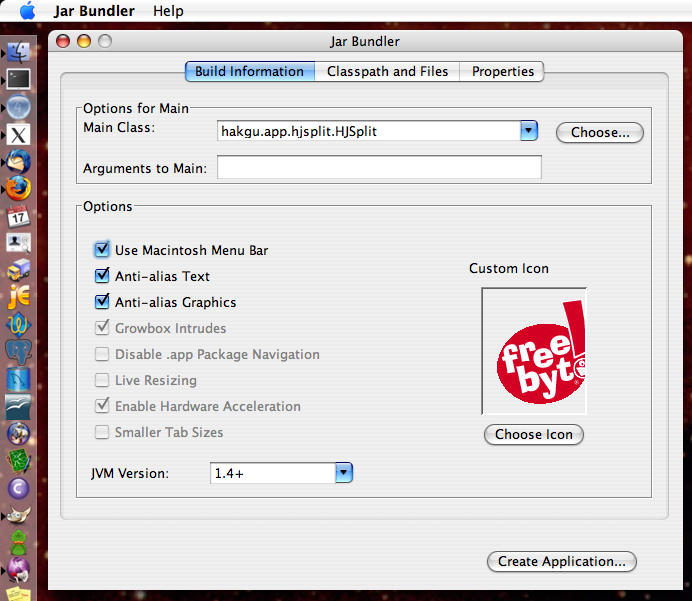
Now that you have your icon created we can go on and create the Application (assuming you actually have the JAR you want to turn into an App of course!). To do this open up the JAR Bundler. Then choose your JAR file and set your icon. Now you need to decide what version of Java your App should be targeted at. At the moment I would advise targeting version 1.4+ of the JVM. You now have one more choice to make, do you want your new App to have it’s menu bar items in the Apple Menu Bar at the top of the screen like regular OS X Apps or at the top of the Apps window like regular Java Apps. To make your choice just check or un-check the Use Macintosh Menu Bar check box. You should note that if the Java app you are wrapping does not use the standard Java GUI classes then the menus may appear at the top of the App’s Window regardless of whether or not you checked the box. Now just click Create Application ... and choose where you want your new App saved. That’s it, you’re done!
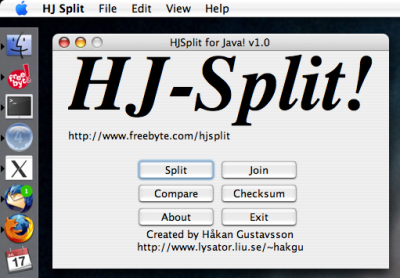
Below is a screen shot of the finished product running. Note it has its own icon on the Doc and that it’s menu items are in the Apple Menu Bar.
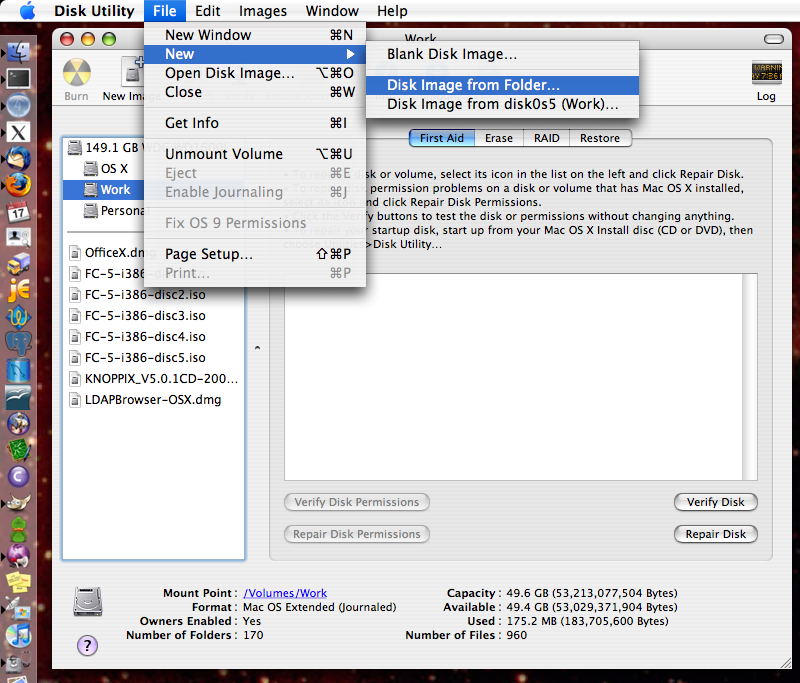
If you want to distribute your new App you may want to create a Disk Image for it (.dmg file). You can do this with the Disk Utility. Just stick the App and any other files you want bundled (like a licence or a readme) into a folder, then open Disk Utility and select File -> New -> From Folder, point it at your folder, pick a name and you’re done!
Here’s some good articles on making your Java app’s more Mac like
http://java.sun.com/developer/technicalArticles/JavaLP/JavaToMac/
http://java.sun.com/developer/technicalArticles/JavaLP/JavaToMac2/
http://developer.apple.com/technotes/tn/tn2031.html
Thanks Nick, they are very handy little articles for anyone coding their own Java GUI Apps.
Thanks for a great article! This is exactly the stuff I couldn’t find last time I searched.
Hi Bart ;
I reag this blog , and found it very useful ,
I have a question and I need the answer ASAP .
How to Create MAC application from jar file on Windows platform ?
I do not have MAC OS .
I want to ask you some questions via my email , if you have used msn 🙂
Hi Abdul,
You need OS X to build and test OS X apps. Since you can’t ship apps without testing this is not a big deal. If you’re gonna ship a Mac App you need a Mac.
Bart.
hi Bart;
can I send to you jar file and icon to convert it to MAC OS application ,
I will be very thankful ,
sorry :$
[…] found this post a few days ago stating how to create an OSX Application from a normal Java jar file using the Jar […]
hi,
I face a problem and i was wondering if you could help me
After downloading an application on my Mac i saved it without the .app in the end (my mistake) and now i can’t find it in the aplications and it only opens as java code.
should i follow the above steps to convert the java code into .app again?